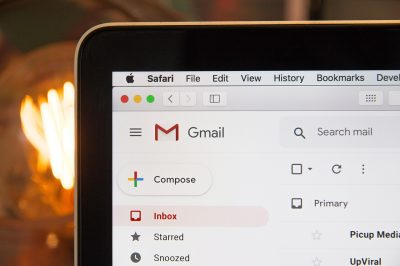
Gmail is a powerful email platform that offers a wealth of features designed to enhance productivity and streamline communication. However, many users may not be aware of all the available tools and options that can help them use Gmail more efficiently. In this article, we will explore 10 tips to help you optimize your Gmail experience and boost your productivity.
Tip 1: Organize Your Inbox with Labels and Filters
Use Labels for Categorization
Gmail’s labeling system allows you to categorize your emails for easy organization and retrieval. Instead of folders, Gmail uses labels, which can be applied to multiple messages simultaneously. You can create custom labels and color-code them for easy visual identification.
Automate Sorting with Filters
Filters are a powerful way to automate the organization of your inbox. You can create filters to automatically label, archive, delete, or forward emails based on specific criteria, such as the sender, subject line, or keywords within the email body. By using filters, you can reduce manual email sorting and keep your inbox clutter-free.
Tip 2: Utilize Keyboard Shortcuts
Speed Up Your Workflow
Gmail offers a variety of keyboard shortcuts that can help you navigate your inbox, compose emails, and perform various actions more quickly. Some useful shortcuts include:
cto compose a new emailjandkto navigate between messages in your inboxeto archive a selected emailrto reply to an emailato reply-all
Enable and Customize Shortcuts
To enable keyboard shortcuts, go to Gmail settings by clicking on the gear icon, then click “See all settings” and scroll down to the “Keyboard shortcuts” section. You can also customize your shortcuts by enabling “Custom keyboard shortcuts” in the “Advanced” tab within the settings.
Tip 3: Use Smart Compose and Smart Reply
Speed Up Email Composition
Smart Compose is an AI-powered feature that helps you write emails faster by suggesting complete sentences as you type. To enable Smart Compose, go to Gmail settings, click on the “General” tab, and scroll down to the “Smart Compose” section. Smart Reply, on the other hand, offers suggested responses based on the content of the received email, allowing you to quickly reply with a single click.
Tip 4: Schedule Emails for Optimal Timing
Send Emails at the Right Time
Gmail allows you to schedule emails to be sent at a specific date and time, ensuring that your messages are delivered at the most appropriate or convenient moment. To schedule an email, click on the arrow next to the “Send” button and choose “Schedule send.” You can then select a predefined time or set a custom date and time for your email to be sent.
Tip 5: Use Gmail’s Advanced Search Features
Find Emails Quickly
Gmail’s advanced search features can help you quickly locate emails by searching for specific criteria, such as sender, recipient, subject line, or keywords. Click on the down arrow in the search bar to access the advanced search options, and enter your desired criteria to find the relevant emails.
Tip 6: Enable Undo Send to Prevent Mistakes
Recall Sent Emails
Gmail’s Undo Send feature allows you to recall a sent email within a specified time window, helping you prevent errors and miscommunications. To enable Undo Send, go to Gmail settings, click on the “General” tab, and scroll down to the “Undo Send” section. Here, you can enable the feature and choose a cancellation period between 5 and 30 seconds. Once enabled, you’ll see an “Undo” option appear after you send an email, allowing you to recall the message within the selected time window.
Tip 7: Integrate Gmail with Google Calendar and Tasks
Enhance Productivity with Google’s Ecosystem
Gmail can be integrated with Google Calendar and Tasks to help you manage your schedule and to-do list directly from your inbox. For instance, you can create events from emails by clicking the “More” button (three vertical dots) within an email and selecting “Create event.” Similarly, you can add tasks by selecting “Add to Tasks” from the same menu.
Tip 8: Use Gmail’s Confidential Mode
Protect Sensitive Information
Gmail’s Confidential Mode allows you to send emails with an expiration date and restricts the recipient’s ability to forward, copy, print, or download the email’s content. This feature is particularly useful for sharing sensitive information or time-sensitive documents. To send an email in Confidential Mode, click on the padlock icon with a clock at the bottom of the compose window and set your desired expiration date and access restrictions.
Tip 9: Utilize Gmail’s Priority Inbox
Focus on Important Emails
Gmail’s Priority Inbox automatically sorts your emails based on their importance, helping you focus on the most relevant messages and reducing distractions. To enable Priority Inbox, click on the gear icon, select “See all settings,” and then click on the “Inbox” tab. Choose “Priority Inbox” from the “Inbox type” dropdown menu and customize the sections according to your preferences.
Tip 10: Take Advantage of Gmail Add-ons
Enhance Functionality with Third-Party Integrations
Gmail supports various third-party add-ons that can help you enhance its functionality and streamline your workflow. Some popular add-ons include Trello, Zoom, and Grammarly. To browse and install Gmail add-ons, click on the “+” icon located on the right sidebar of your Gmail interface and explore the available options in the G Suite Marketplace.


